One metric for a website's success is the amount of traffic it receives. For a blog, this translates to page views. Articles with lots of views indicate the content your readers care most about. This helps drive future articles.
Most people measure view counts via analytics (like Google Analytics). However, with the rise of ad-blocking browser extensions, these counts are likely ~10% off (especially if your target market is tech). What if we could have better accuracy, better performance, and better privacy for our users?
This post will show how to display real-time view counts for a given blog post using Firebase. We can host and deploy this entire solution for free using Firebase's free tier and Vercel.
Setting Up Firebase
- If you do not have a Firebase account, create one first.
- Create a new project.
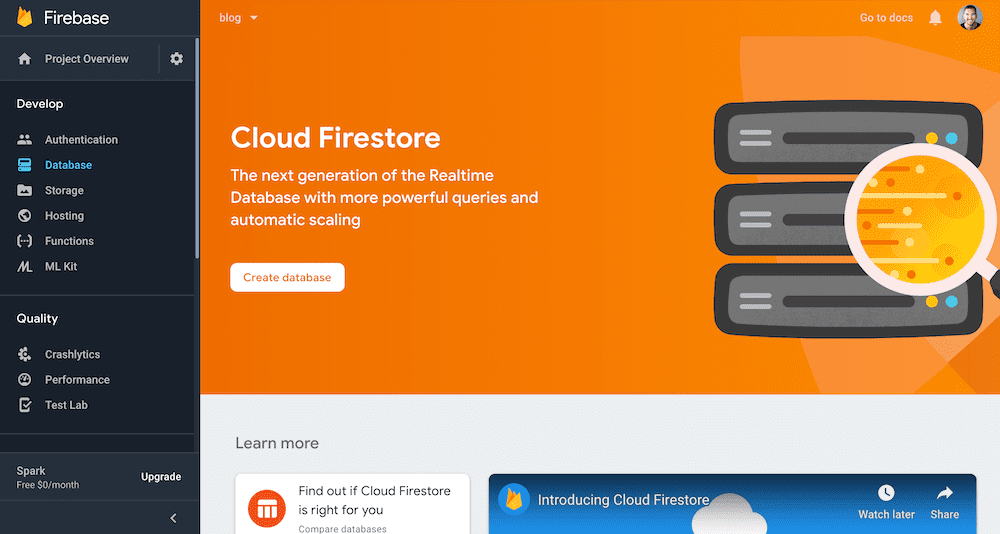
- Navigate to "Database" and click "Create Database".
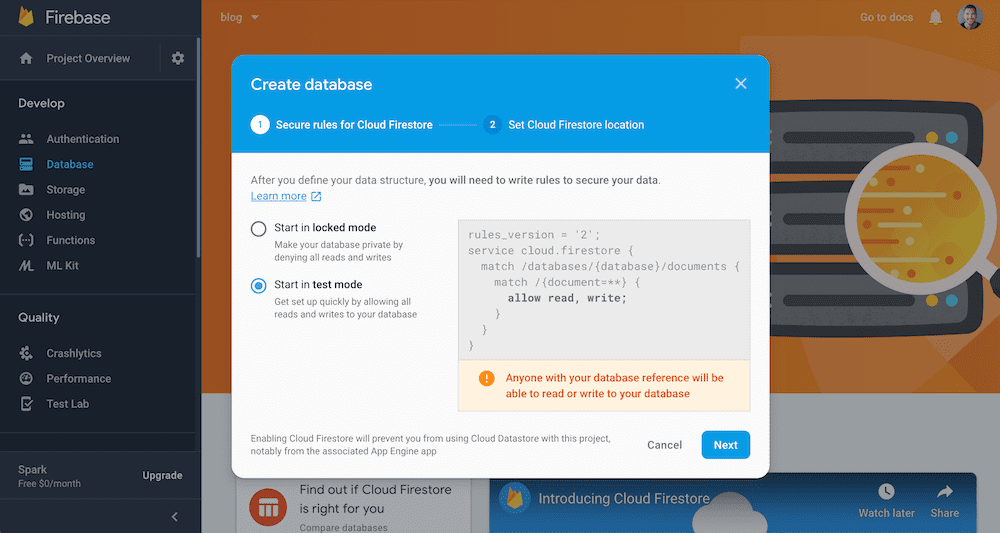
- Start in test mode and click next.
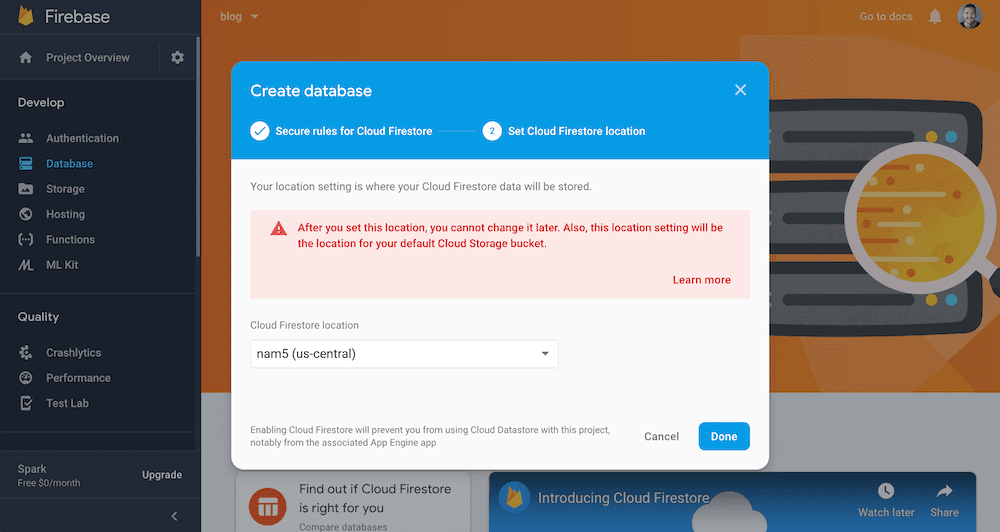
- Choose your database location and click done.
- In the top left, click on "Project Settings".
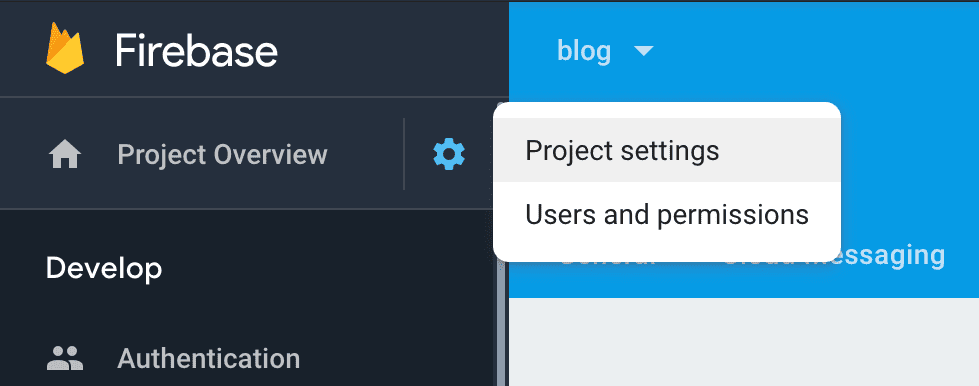
- Navigate to "Service Accounts" tab and click "Generate new private key". Save the
.jsonfile. You will need this later.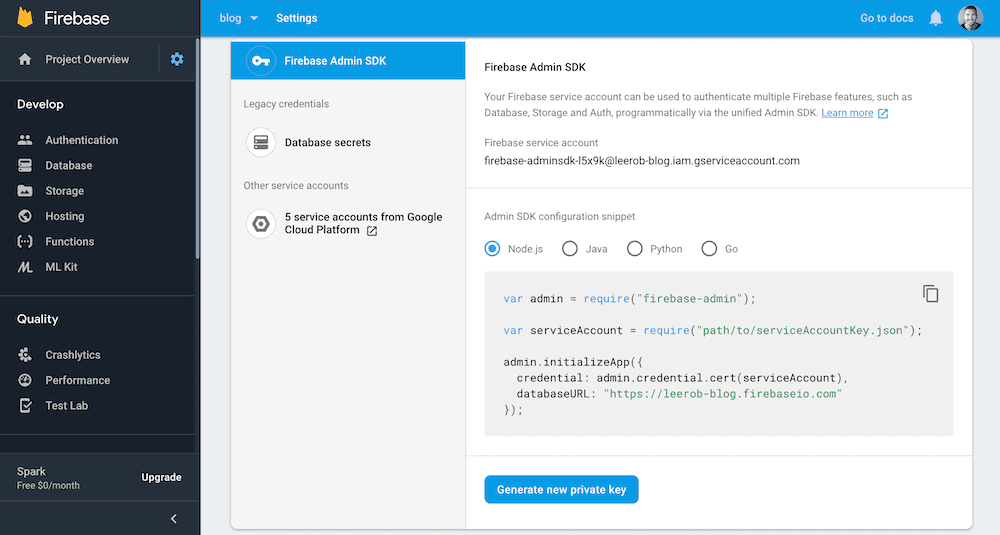
We're finished! 🎉 You have successfully set up a realtime database, as well as generated credentials to connect to the database.
Connecting To Firebase
First, we need to install the firebase-admin server-side SDK.
yarn add firebase-adminNext, we need to create an .env.local file to add the values for the Firebase service account .json file.
Specifically, private_key, project_id, and client_email.
NEXT_PUBLIC_FIREBASE_PROJECT_ID=replace-me
FIREBASE_CLIENT_EMAIL=replace-me
FIREBASE_PRIVATE_KEY="replace-me"
Make sure you include the quotes around "replace-me" for FIREBASE_PRIVATE_KEY.
You will need to restart your application to load new environment variables.
Create a new file lib/firebase.js to initialize the application and establish a connection.
import * as admin from 'firebase-admin';

if (!admin.apps.length) {
  admin.initializeApp({
    credential: admin.credential.cert({
      projectId: process.env.NEXT_PUBLIC_FIREBASE_PROJECT_ID,
      clientEmail: process.env.FIREBASE_CLIENT_EMAIL,
      privateKey: process.env.FIREBASE_PRIVATE_KEY.replace(/\\n/g, '\n'),
    }),
  });
}

const db = admin.firestore();

export { db };
Tracking Views
To track a view, we need to look at the database for views -> id. Let's create a new API Route
to communicate with our database and increment the views for a given id.
API Routes provide a straight-forward solution for building an API inside Next.js.
All you need to get started is an api/ folder inside your main pages/ folder where your routes live. Every file inside pages/api/ is mapped to /api/*.
import { db } from '../../lib/firebase';

export default async (req, res) => {
  if (req.method === 'POST') {
    const ref = db.ref('views').child(req.query.slug);
    const { snapshot } = await ref.transaction((currentViews) => {
      if (currentViews === null) {
        return 1;
      }

      return currentViews + 1;
    });

    return res.status(200).json({
      total: snapshot.val(),
    });
  }
};
For an API route to work, you need to export a default function (i.e., request handler), which receives the following parameters:
req: An instance of http.IncomingMessage, plus some pre-built middlewares.res: An instance of http.ServerResponse, plus some helper functions.
Testing View Counts
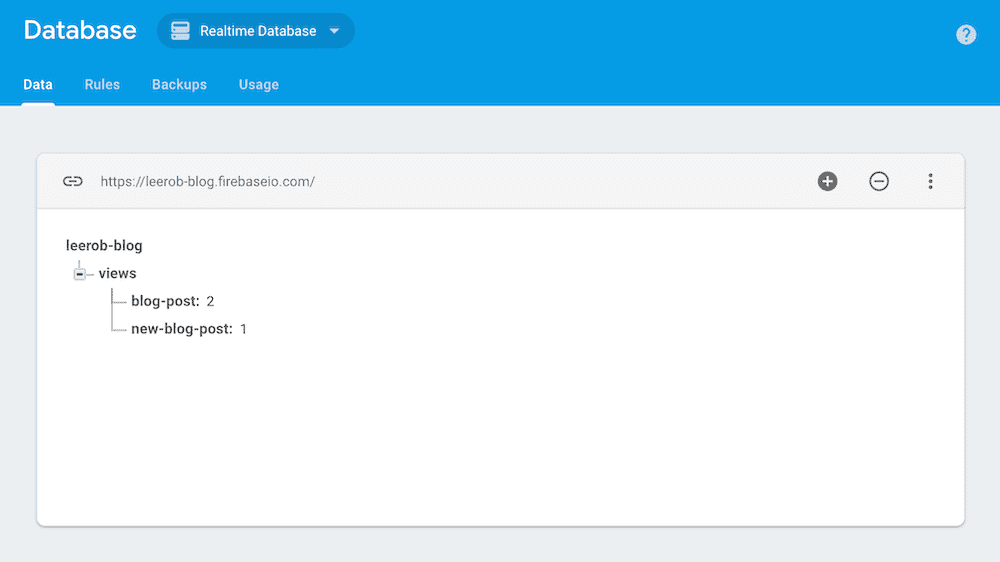
Using your favorite REST client or your browser, you can now hit http://localhost:3000/api/views/my-blog to log a view.
We can confirm it was logged correctly by checking Firebase.
Fetching Data from Firebase
SWR is a React Hooks library for remote data fetching. SWR first returns the data from cache (stale), then sends the fetch request (revalidate), and finally comes with the up-to-date data again.
This will allow us to fetch view counts from Firebase. If you re-focus or switch between tabs, SWR will automatically revalidate data.
Let's install SWR now.
yarn add swrNext, we need to update our API Route to fetch the views for a given post.
import { db } from '../../lib/firebase';

export default async (req, res) => {
  if (req.method === 'POST') {
    const ref = db.ref('views').child(req.query.slug);
    const { snapshot } = await ref.transaction((currentViews) => {
      if (currentViews === null) {
        return 1;
      }

      return currentViews + 1;
    });

    return res.status(200).json({
      total: snapshot.val(),
    });
  }

  if (req.method === 'GET') {
    const snapshot = await db.ref('views').child(req.query.slug).once('value');
    const views = snapshot.val();

    return res.status(200).json({ total: views });
  }
};
View Counter
Let's create a ViewCounter component to use SWR.
import { useEffect } from 'react';
import useSWR from 'swr';

async function fetcher(...args) {
  const res = await fetch(...args);

  return res.json();
}

export default function ViewCounter({ slug }) {
  const { data } = useSWR(`/api/views/${slug}`, fetcher);
  const views = new Number(data?.total);

  useEffect(() => {
    const registerView = () =>
      fetch(`/api/views/${slug}`, {
        method: 'POST',
      });

    registerView();
  }, [slug]);

  return `${views > 0 ? views.toLocaleString() : '–––'} views`;
}
Finally, we can consume the view counter in our blog post and pass in the ID.
<ViewCounter slug="my-post" />Deployment with Vercel
When adding your Firebase private key inside the Vercel dashboard, ensure that you
convert new line characters (\n) to actual new lines. For example, here's a fake private key.
-----BEGIN PRIVATE KEY-----
MIIEvAIBADANBgkdhkiG9w0BAQEFABBBBKYwggSiAgEAAoIBAQClyaHok1jDXoVg
JDbtpaNeR7tdHTIwpplhfzXBWBsYc+aTIKZssYYJoFQ6RIV4ky5Kau05CrAoUSAr
FWuuqbtnW/2pTiG2YNwmEMDOMWusdWnMDyyTtx7krA1BZuQ1HrrNjhoNvMpBnO9o
ELBo/BQbhDg7lhv1VWjsfRIFNBKkEG7qPkRZ2FUvbXlpsPueJbEREe4IYCKlhvJA
LsoG5HfdePv+7Bhv2IXBd3+JZhP+LnWeAxvsxmUYA4Q1sF/ItfMRLvX/b3c6UyQh
X+hn7KrsUPIuITJmWI+27tzt0Hz8W2JXy47PpSW3+xyPuLfnGZREbQDGiPT9tLPh
1Go9FpWvAgMBAAECggEAFY8/F7bvIjrXJZxTVVX+IbM06YV/H/z5j08pUVcN4Xhr
ns/pI89abTLtCNQam4iFxsp+uKt+ISPDEBsw+YvElkvWnhdEKiYjTwtsOPcU1V5S
N3vbEkAU1TjiWZ7zL0IcleWAuX342gN+7JEQkAAfFxvWCV8fsjQ7BGuix+7sZ1xP
OxaD9PCcT4CHm093ksn2uv0BcQD1ect0zxlyjKyBiDLwwUWmDRgeZwNw0ca09TAd
QVvB9tewXmSQfXaim9Cm8bU1sN3kUSLWZf1ItU9cC0EUFnf3cttqyDfviYi0gg9p
7uAdbFka89vz3O3d/b+M8YrDqVvduJuqpAphr+v7sQKBgQDmSqaQ09uBs/G4KvcB
yzF1zjD1moeIZ/EnifNQ1/fs+0gbgthHFpH2ZCn7XAc0veF6nqSaUxSUVOAujfgP
xlOxt+q56iZ+LpQzemgZDOeclIdqSEJ3kNP1QhNtVvhdWfJtVO4ctvt2ZOKKgXnf
u2hFwiV4W5JKWWFNZD7E3jA6nQKBgQC3yp3H6NLpKrK4UrRgrwVwu7ox8YTFxfmG
k4k/mul7GxegMaCKgvf4xibg8WnvAszB6wdqdOtp5HsEmAMUG3LjRwyJEQs6niJJ
WxH4YHg5deONTbG9NLDUGW4Frq577zfj3jKwsIWE/5zczFn04S1NRyfsdzMVoP01
8qvSPClJuwKBgAj0/FeDtfTsf8lO+n56XbkcRPE4im72w/1qsykAzWbNOze+tcUe
Dp1LtgpNwQX/IKb5RqOt+Y3vYyzMXsqWRykRYhLJ9adQvnjmGOhohRWk/UNX/iXS
XzwZztGg4VYYKoKwG/bH8y3erKUAdjIKgvq7m2N8BEuaAFvXO03C6pNNAoGALski
TyBiiD55TlinWDFVljQDmvEbVmkmMu7dslZR9yeXZQ0dDAV48Fgoz3xE9jXlP7v/
oEbxInyqICo+JmEyZs7QTxgKnrpgigHn2i1cjWwIKBFOHJcMKIHssv+bpSrpNFV8
2+OjqY6UNNTEVYT4zkI91IEnfOsFajVDLfponD8CgYBajSsT31li/QB2GT7vYexT
dkAg3WB7iX/RLzt81H4fpN3HXd0BklSlWLZDLu9Cmd+XgA1iKHL+pLkaocs1zM/L
ZGUJECjLVIPDySOUcX7SGTrChN3Q1Rn0dXdUsrWkBWopGmtz1D99aIzfylXnnyjQ
IlpxVgdxp5tb9JOG3aoMMg==
-----END PRIVATE KEY-----
Note the extra new line at the end.
Conclusion
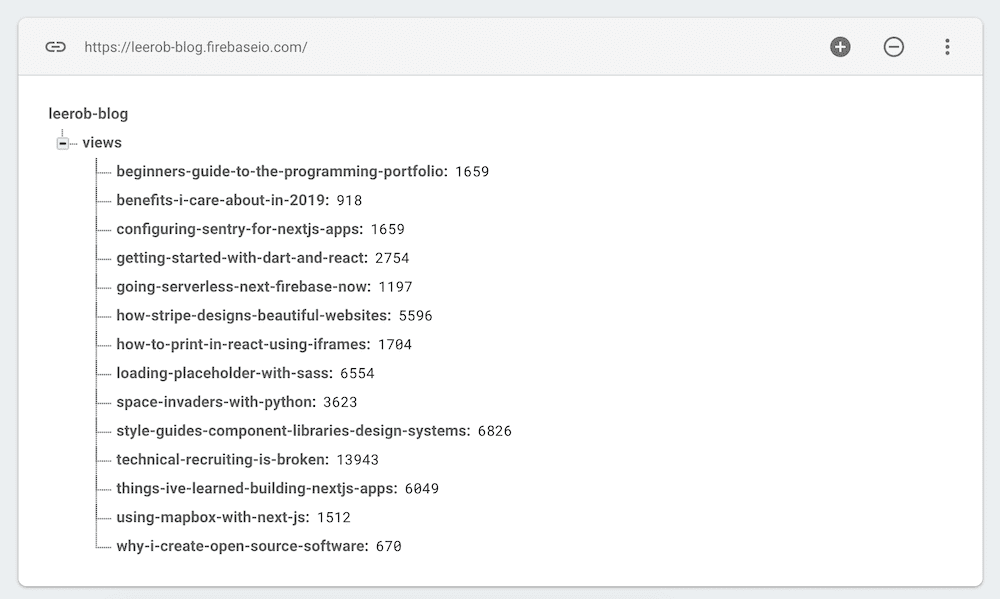
You can view a completed example by checking out this blog post's source code. I was able to migrate my page views from Google Analytics into Firebase via their web interface.
Note: If your site receives a lot of traffic, you'll need to upgrade from the Spark plan (free) to Blaze (pay-as-you-go). On Spark, you can only have 100 simultaneous connections. With Blaze, you can have 100k.
